Introduction
There’s something uniquely satisfying about building a home for your chickens. Not only does it provide them with a safe and comfortable space, but it also gives you the opportunity to customize every aspect of their environment. Today, I’ll guide you through the process of building your own DIY chicken coop.

Why Build a DIY Chicken Coop?
If you’ve ever considered raising chickens, you know that a well-built coop is essential. But why go DIY? Building your own chicken coop allows you to tailor it to your specific needs. You can choose the size, materials, and features that best suit your flock and your backyard. Plus, it’s a rewarding project that can save you money!
Planning Your Chicken Coop
Before you start hammering nails, planning is key. The first step is to determine the size of the coop. How many chickens do you plan to keep? A good rule of thumb is 3-4 square feet per chicken inside the coop, plus 10 square feet per chicken in the run. This ensures they have enough space to stay healthy and happy.
Choosing the Right Size
The size of your coop will depend on the number of chickens you want to keep. Ensure each chicken has enough space to move comfortably, especially if they’ll be spending a lot of time indoors due to weather. If you’re planning to expand your flock in the future, consider building a slightly larger coop now.
Selecting the Best Location
Location, location, location! Find a spot in your yard that’s level and well-drained to avoid water accumulation. Consider placing the coop in a shaded area to keep your chickens cool during hot days. Accessibility is also crucial—make sure it’s easy for you to reach the coop for daily care and maintenance.

Materials and Tools You’ll Need
Now that you’ve planned your coop, let’s gather materials and tools. Essential materials include plywood for walls, treated lumber for the frame, hardware cloth for predator-proofing, and a solid roofing material. As for tools, a saw, drill, hammer, measuring tape, and level are must-haves.
Essential Materials
When it comes to materials, quality is important. Treated lumber will withstand the elements and last longer, while hardware cloth is far superior to chicken wire in keeping predators out. Don’t forget roofing material to protect your chickens from rain, snow, and excessive sunlight.
Recommended Tools
The right tools will make your job easier and your coop more solid. A saw and drill are essential for cutting and assembling materials. A hammer and nails, along with screws, will hold everything together. A measuring tape and level ensure accuracy, while a staple gun is perfect for securing hardware cloth.
Step-by-Step Guide to Building Your Chicken Coop
Now comes the fun part: building! Start with the frame, which will provide the structure and stability of your coop. Use treated lumber for durability. Once the frame is up, add walls using plywood. Secure everything with screws to ensure longevity.
Building the Frame
The frame is the skeleton of your coop. Start by constructing the base, ensuring it’s level. Then, build the sides, making sure each piece is securely attached. Don’t rush this step—taking your time will pay off with a sturdy coop.
Adding Walls and Roof
With the frame in place, it’s time to add the walls. Cut your plywood to size and attach it to the frame with screws. Next, add the roof, ensuring it’s angled to allow rainwater to run off. A solid roof will protect your chickens from the elements.
Installing Nesting Boxes and Perches
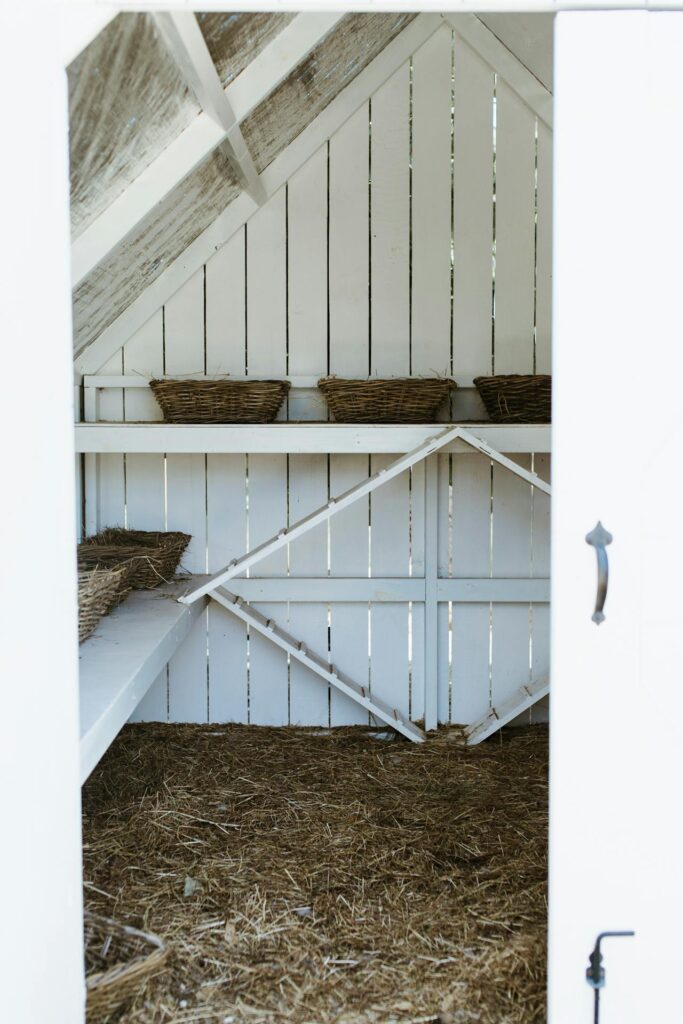
Nesting boxes give your chickens a cozy spot to lay eggs. Install them at a lower height to make them easily accessible. Perches should be higher up, as chickens like to roost off the ground at night. Use rounded wooden dowels for comfort.
Adding the Final Touches
With the main structure complete, it’s time for the finishing touches. Add a door that’s secure but easy for you to open. Install hardware cloth around the coop to keep predators out. Finally, add bedding, food, and water stations inside.

Maintenance and Care Tips
A well-built coop is only the beginning. To keep your chickens happy and healthy, regular maintenance is a must. Start with cleaning—remove droppings and replace bedding regularly to keep the coop fresh and odor-free. Ventilation is key to preventing respiratory issues, so ensure your coop has adequate airflow.
Cleaning and Ventilation
Keeping the coop clean is vital. A dirty coop can lead to disease and discomfort for your chickens. Replace bedding weekly and deep clean the coop every few months. Good ventilation will help reduce ammonia build-up from droppings, keeping the air fresh and your chickens healthy.
Predator Protection
Chickens are vulnerable to predators like raccoons, foxes, and hawks. Secure your coop with strong locks and cover any windows or gaps with hardware cloth. Consider burying the hardware cloth around the perimeter of the coop to prevent digging predators from getting in.
Conclusion
Building a DIY chicken coop is a rewarding project that allows you to create a safe, comfortable home for your flock. With careful planning, quality materials, and regular maintenance, your chickens will thrive in their new environment. Whether you’re a seasoned DIYer or a beginner, this project is a great way to get hands-on experience while providing for your chickens.
FAQs
Q: How much does it cost to build a DIY chicken coop?
A: The cost varies based on the size and materials, but a basic coop can be built for around $200-$500.
Q: How long does it take to build a chicken coop?
A: Depending on your experience and the complexity of the design, it can take anywhere from a weekend to a few weeks.
Q: What should I include in my chicken coop?
A: Essential elements include nesting boxes, perches, food and water stations, and secure doors and windows.
Q: Can I use recycled materials to build my coop?
A: Absolutely! Recycled materials can save money and add character to your coop. Just ensure they’re safe and durable.
Q: How often should I clean the chicken coop?
A: A quick clean should be done weekly, with a more thorough cleaning every few months to maintain a healthy environment.